SET FOR THE QUALITY CONTROL OF INTRAOPERATIVE PROBESRATORIAS

Parts:

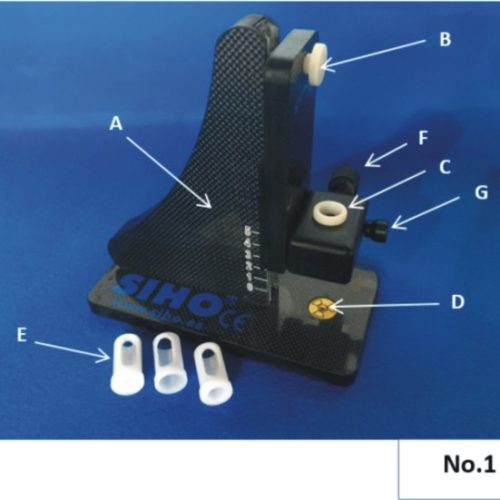
A. Graduated support for the maintenance of the measurement geometry and the source-probe distance.

B. Screw for fixing the different measuring distances.

C. Graduated support for fixed part, according to the diameter of the probe.

D. Disk for location and measurement of point source.

E. Graduated supports for different probe diameters.


For air tests:

  1. Air sensitivity
  2. Sensitivity through lateral air shielding

Description: The probe is located with the corresponding device in C, adjusting with the screw F and measurements are made in air for 0, 1, 3 and 5 cm. In the case of test 2, the piece of C is rotated 90 ° from the horizontal position, carefully holding and moving the pin G just upwards, to the hole in the left front edge of the support.

NOTE:

Handle each piece with care, without forcing it and when using unfinished liquid finite source locate it in the same 5mm hole, without spilling and do not see it.

ONLY MANIPULATE BY TRAINED PROFESSIONALS

Parts:

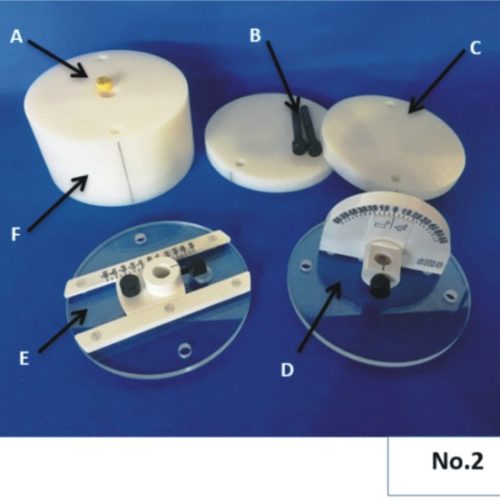
A. Support ᶲ 20 mm with centered hole of ᶲ 5 mm for liquid finite source not sealed.

B. Fastening bolts for all plates.

C. Plate with thickness of 20 mm and ᶲ 200 mm.

D. Plate with thickness of 10 mm and ᶲ 200 mm, with device for angular displacement of the probe.

E. Plate with thickness of 10 mm and ᶲ 200 mm, with device for Linear displacement of the probe.

F. Solid base of the device with a thickness of 100 mm and ᶲ 200 mm.

Tests with a finite source in dispersing medium equivalent to water:

  1. Sensitivity in dispersing medium
  2. Sensitivity to dispersion
  3. Spatial resolution in a dispersing medium
  4. Angular resolution in a dispersing medium
  5. Stability of short-term sensitivity
  6. Capacity of account rates in a dispersing medium
  7. Energy resolution

Description: The probe is located in the devices E and D for the linear and angular controls, respectively, measuring on the device F and increasing thickness with the plates C and adjacent, to achieve 10, 30 and 50 mm of thickness with respect to the position of the source that will be located in the device A. With the bolts B over the lateral fixing holes of each plate, the maintenance of the measurement geometry is guaranteed, without any change of the same in each case.

NOTE: Handle each piece with care, without forcing it and when using unsealed liquid finite source place it in the same 5 mm hole, without spilling and do not turn it. ONLY MANIPULATE BY TRAINED PROFESSIONALS.

Parts:

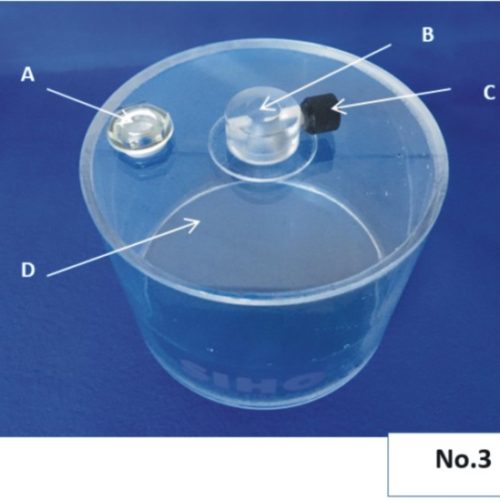
A. Plug for filling with water and addition of radioactive isotope.

B. Positioner for the probe to be measured.

C. Clamping screw.

D. Refillable cylindrical tank of height 150 mm and ᶲ 200 mm.

Test for distributed source in a dispersing medium:

  1. Sensitivity to the activity distributed in a volume of a dispersing medium.

Description: Cap A is opened and filled with water, avoiding shaking so that bubbles do not form. The required activity is added, mixed and left to rest for 15 min. The probe is located in part B and is adjusted with screw C.

NOTE: Handle the device with care, tightly closing the lid before mixing by shaking, avoiding falling and with prior check that there is no escape. Fix the probe carefully, and position it until the end of the hole. Do not push it hard.

ONLY MANIPULATE BY TRAINED PROFESSIONALS.

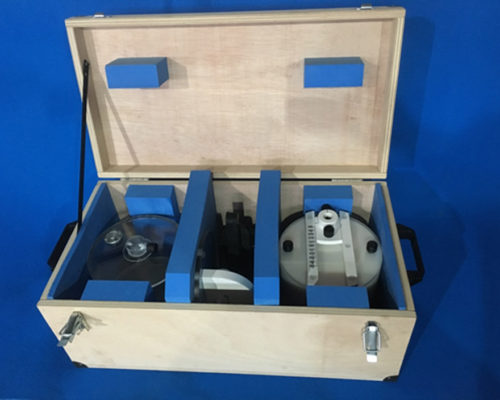
Another important aspect to keep in mind is the conservation of the devices, as well as their location inside the packing box, for which figure 5 is attached.